Installing the Schematic on a New Computer
There is a video – download and upzip http://schemata.dyndns.org/schemata/install.zip - this makes an Executable file (it uses Screen2exe) that you can click and play. Otherwise follow these notes below:
The first time the Schemata tool is installed on a computer some questions are asked about the default placement of Logical Pathnames and so forth. Follow the step below to easily install for the first time.
- Double Click on the Setup File - the setup file is typically something like "setupschematic-r4p3p102.exe" or similar.

- Click "Next" on the first welcome screen

- On the next screen input your name and organization (this is only used when the automatic Wiki documentation feature is used - your name will be entered into the Wiki to allow you to find all your work)
- Accept the Default on the "Start Menu" screen by clicking Next

- On the Additional Tasks screen make these choices - you can always change them later when you get used to using the Schematic

- On the "Ready to Install" window click "Install"

- After Installation the "Information" window appears - click "Next"

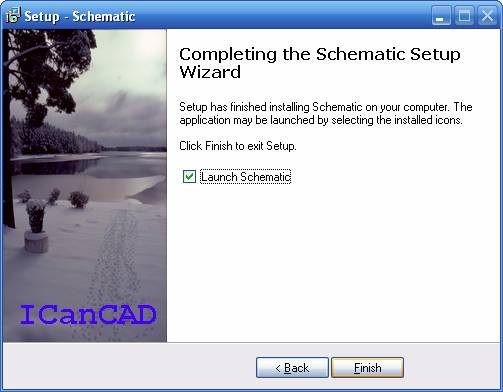
- On the final "Setup - Schematic" window ensure the "Launch Schematic" checkbox is ticked and click "Finish"
- The Schematic will now start. If this is the first time the Schematic has been installed on this machine the following dialog box will be visible (if it is not use Alt-Tab to find it - sometimes the Schematic starts up and it is not the selected application and so is behind some other window)
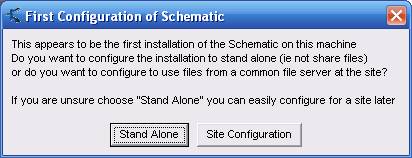
Choose the default option "Stand Alone" for now - we can change it later if you want to have the Schematic operate in a shared network-wide mode.
- The Schematic Drawing window will now open up. We will briefly check the "Logical Pathname Translations" - this is the "map" that the Schematic uses to know where on your disk (or network) to put the Schematic files. Choose the "Tools" > "Logical Pathnames" menu item. Something like this should appear:
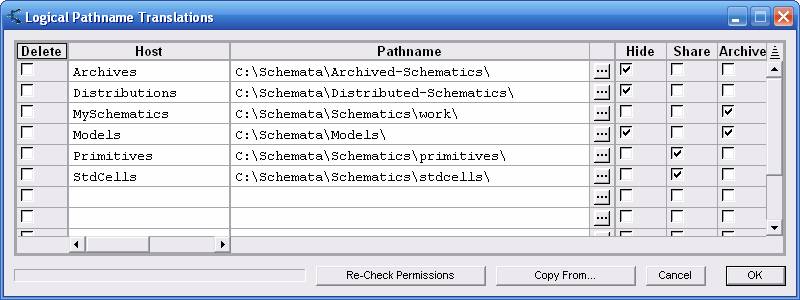
The lines in the table show that when you make something called, for example, "MySchematic:fred.sch" then that schematic will be written to the disk as a file "C:\Schemata\Schematics\work\fred.sch". This is the purpose of logical pathnames - to associate a file on disk with a schematic in a library. Click "OK" to close the Logical Pathname Translation window.
- You have now successfully installed the Schematic - you may now choose "Help" > "Getting Started Guide" or "Help" > "An Early Version of the User Guide" to learn more.